
Create automated follow-up flows based on Loox reviews submitted to your store. Build a flow responding to positive reviews that mentions upcoming sales and special offers, or a flow triggered by negative reviews that offers customer assistance.
The Loox + Klaviyo integration is available on the Convert Plan and up. Click here to upgrade your plan.
Activating the Klaviyo integration
To send follow-up emails to your customers through Klaviyo, Loox must be integrated with your Klaviyo account.
To set up the integration:
- Inside the Loox admin, head to Settings > Integrations > Klaviyo and click Manage.
- Click "Activate integration:".
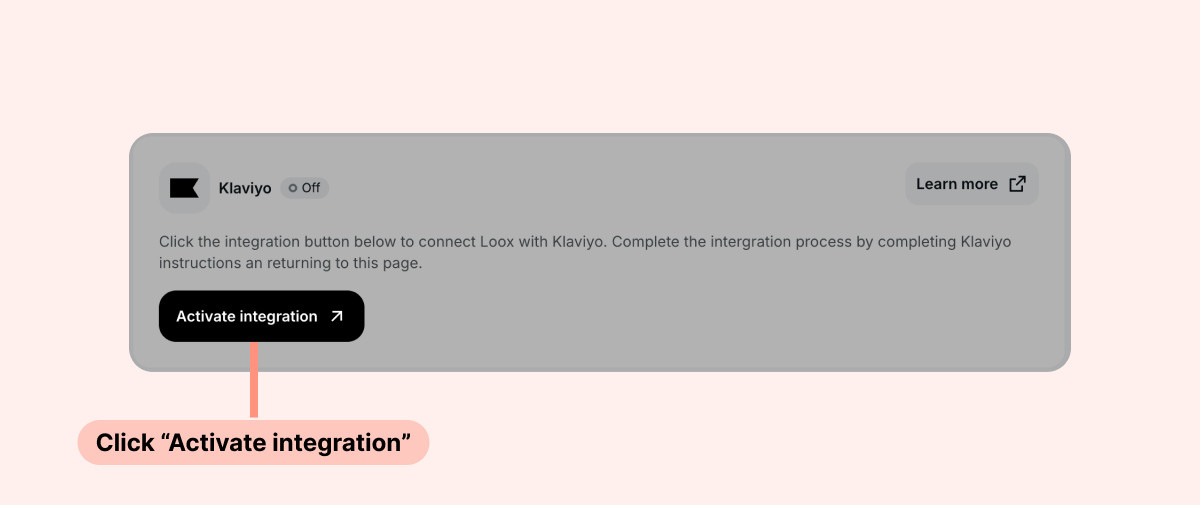
- You’ll be redirected to your Klaviyo account to allow Loox access. Once you allow Loox access, your accounts are connected.
- That's it! You can start creating email flows based on Loox reviews.
Note: If you previously connected Loox with Klaviyo using an API key, please reconnect them to ensure your flows stay up to date: click "Disconnect", then "Activate integration", and follow Klaviyo's instructions. Right after you connect, Loox sends sample events with placeholder values to your own email address's Klaviyo profile. This makes the Loox metrics and all of their properties appear in Klaviyo's flow and segment builders, so you can build your flows before any real event is sent.
Creating a Loox review follow-up flow within Klaviyo
Once you have successfully integrated Klaviyo with Loox, you can create a new Loox review follow-up email flow within your Klaviyo account. When a new review is submitted, Klaviyo will create a "Loox Review Posted" event in the customer's Klaviyo profile. The event is sent when the review is submitted, whether or not it has been published yet. You can use the "Review status" property to filter unpublished reviews out of your flows, but review status updates after the initial submission status are not sent from Loox to Klaviyo.
The event includes the following properties:
| Property | Description |
|---|---|
| Rating | The review's rating (1-5) |
| Author | The reviewer's name |
| Review text | The review's text |
| Verified | Whether the review is a verified purchase (true/false) |
| Review status | The review's status when the event was sent ("Pending" or "Active") |
| Photo Included | Whether the review includes a photo (true/false) |
| Video Included | Whether the review includes a video (true/false) |
| Photo count | The number of photos on the review |
| Video count | The number of videos on the review |
| Review image URL | The image URL of the review's main media. For a video, this is its preview image |
| Discount code | The discount code the review earned, if your store offers a discount for photo/video reviews |
| Discount value | The discount's value (e.g., "10%") |
| Discount expiration date | The discount's expiration date (if it has one) |
| Product Title | The product's name, as listed in Shopify |
| Product URL | The URL of the product page |
| Product ID | The Shopify ID of the product |
| Product variant | The reviewed variant's title |
| Variant ID | The Shopify ID of the reviewed variant |
| Order ID | The order's Shopify ID |
The event is attributed to the customer's Klaviyo profile using their email address and their Shopify customer ID (set as the profile's external ID), helping you keep your Klaviyo customer profiles accurate.
To create a new follow-up flow in Klaviyo based on the "Loox Review Posted" trigger:
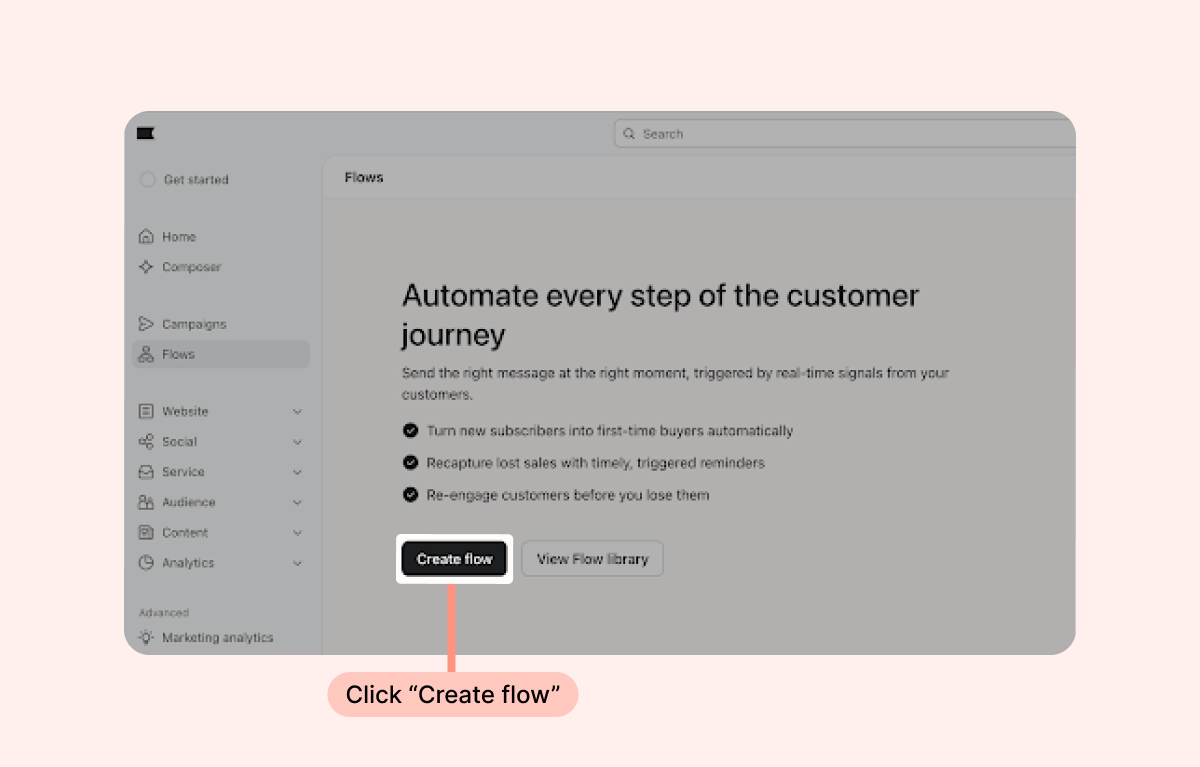
- Inside your Klaviyo account's Flows menu, click "Create flow:"
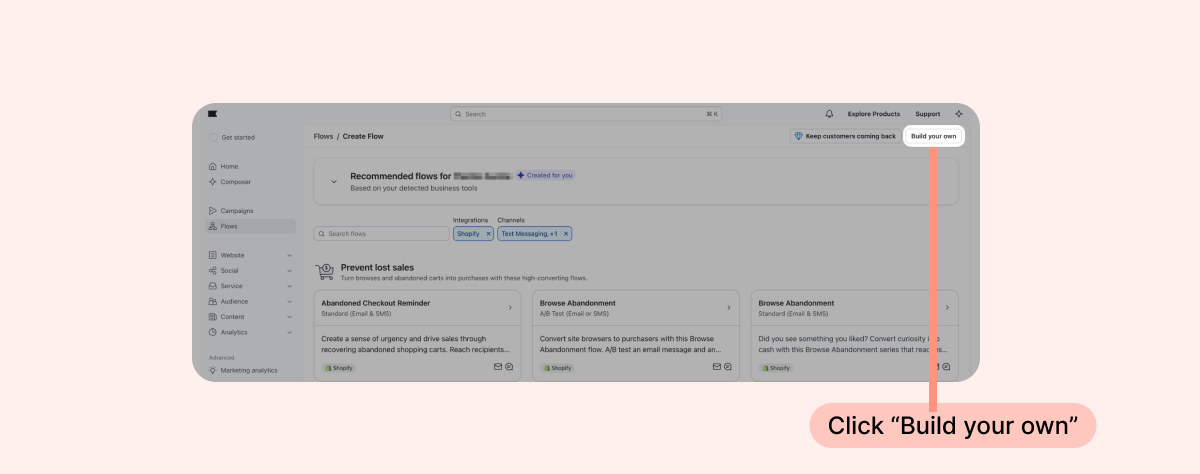
- Click "Build your own:"
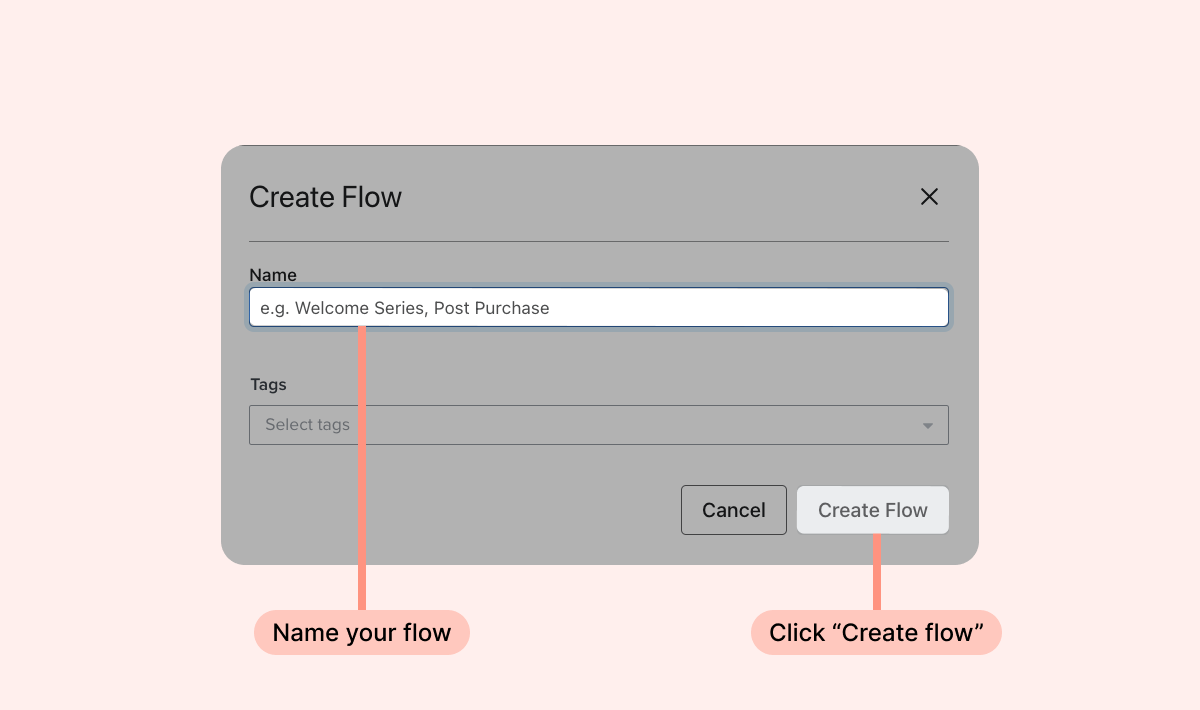
- Name your flow- we recommend calling it "Loox Review follow-up" or "Post-review flow."
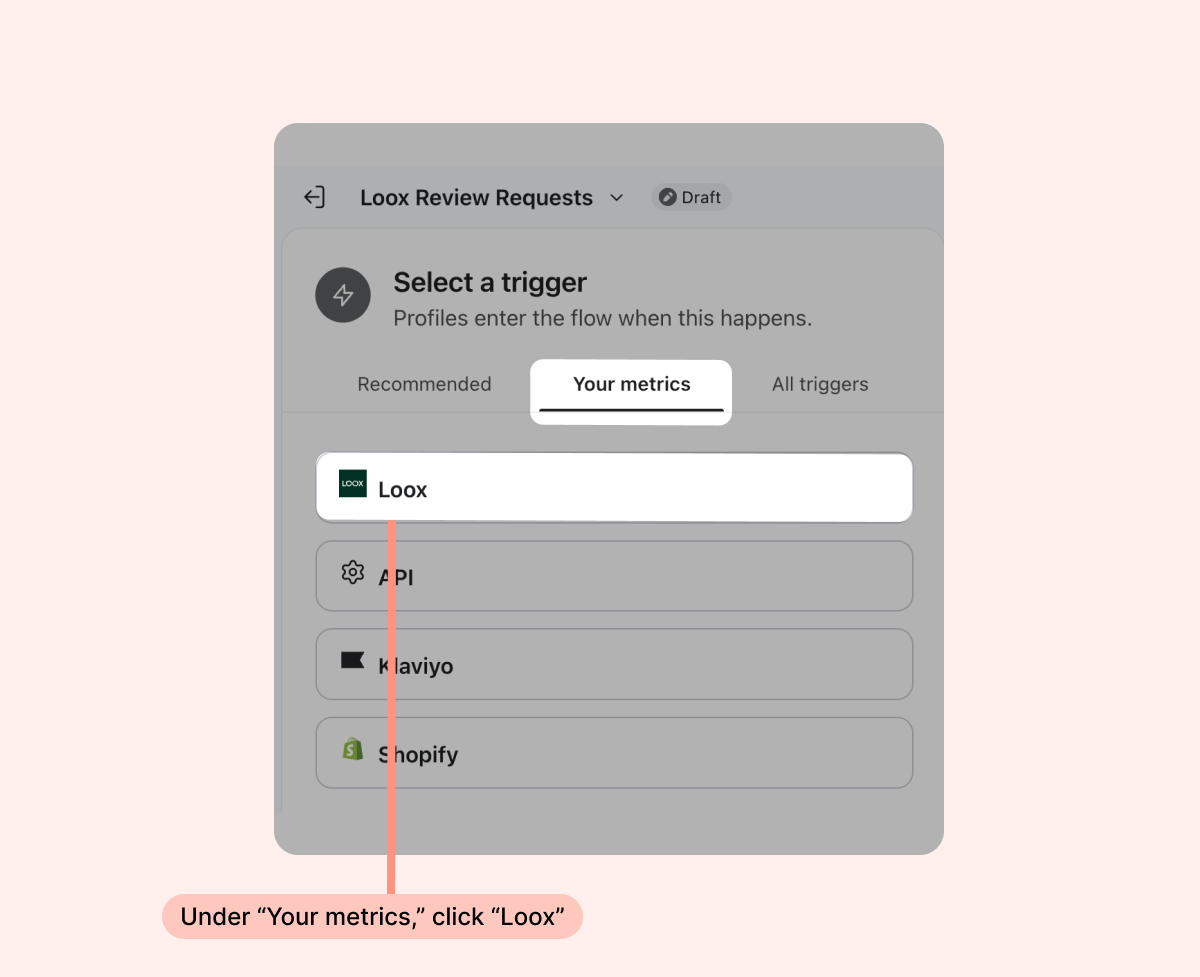
- On the lefthand side, go into "Your metrics" and select Loox.
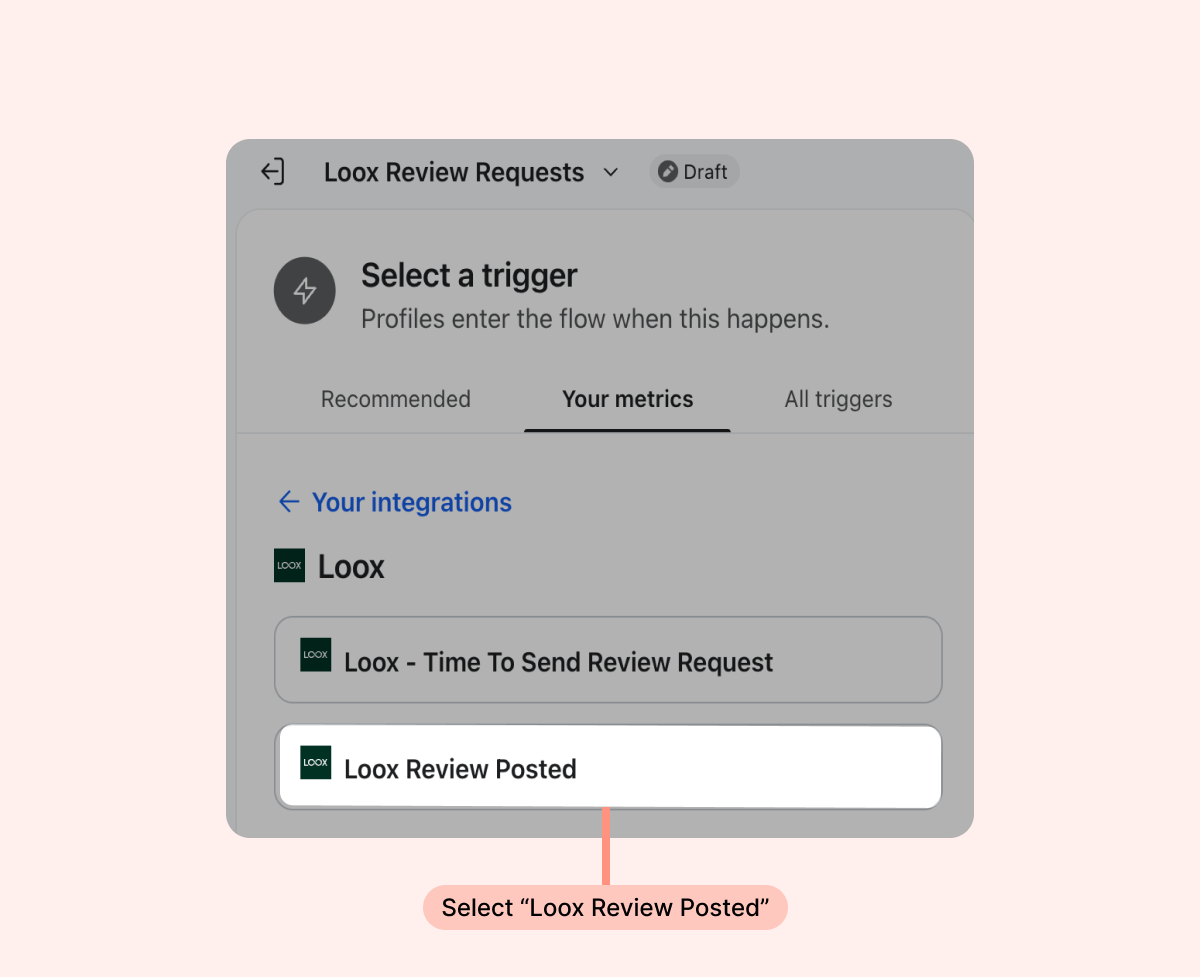
- Select "Loox Review Posted":
- Set up the filters you want to apply to the flow and click "Done".
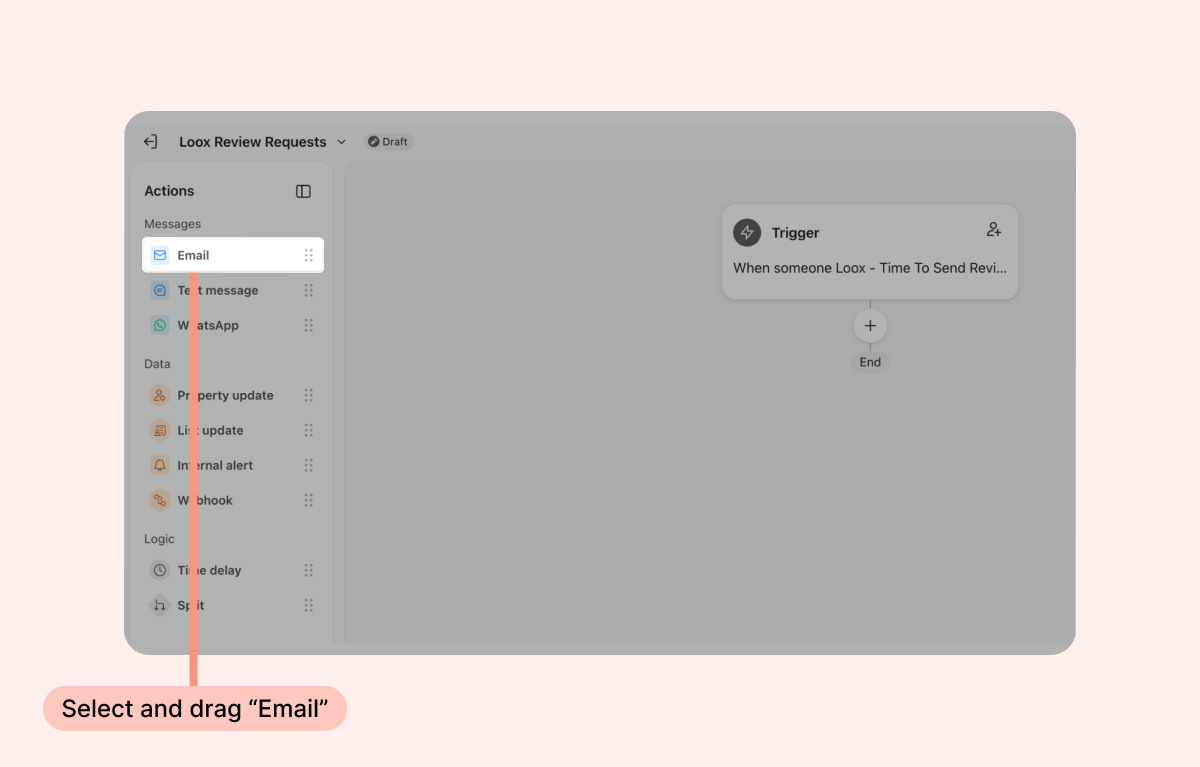
- Drag the “Email” option from the list of actions on the left:
- And drop it under the trigger in the flow template:
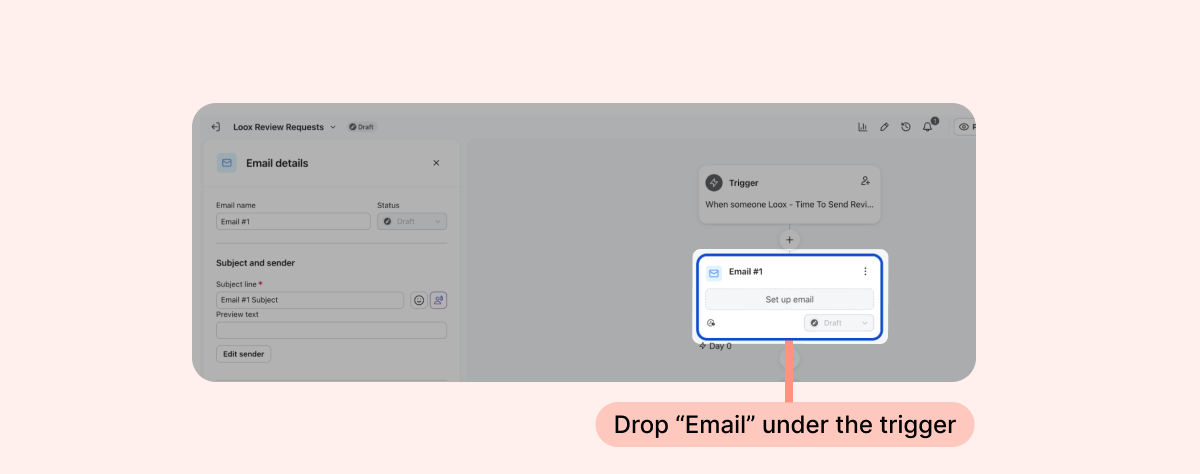
- Configure your email's content, subject line, and template on the “Email details” menu that opens on the left. Click here to learn more about configuring your Klaviyo templates from Klaviyo’s end, and make sure to read about the Loox parameters you can integrate into your Klaviyo email body.
- Next, click “Update status:”
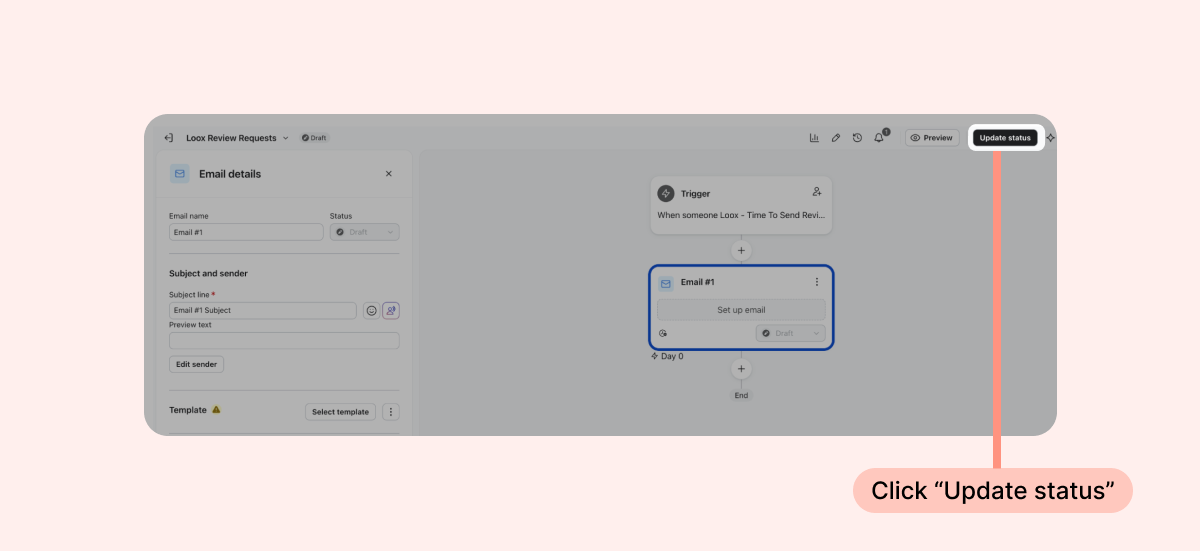
- On the Flow Status dropdown menu, update the status to "Live" and click Save.
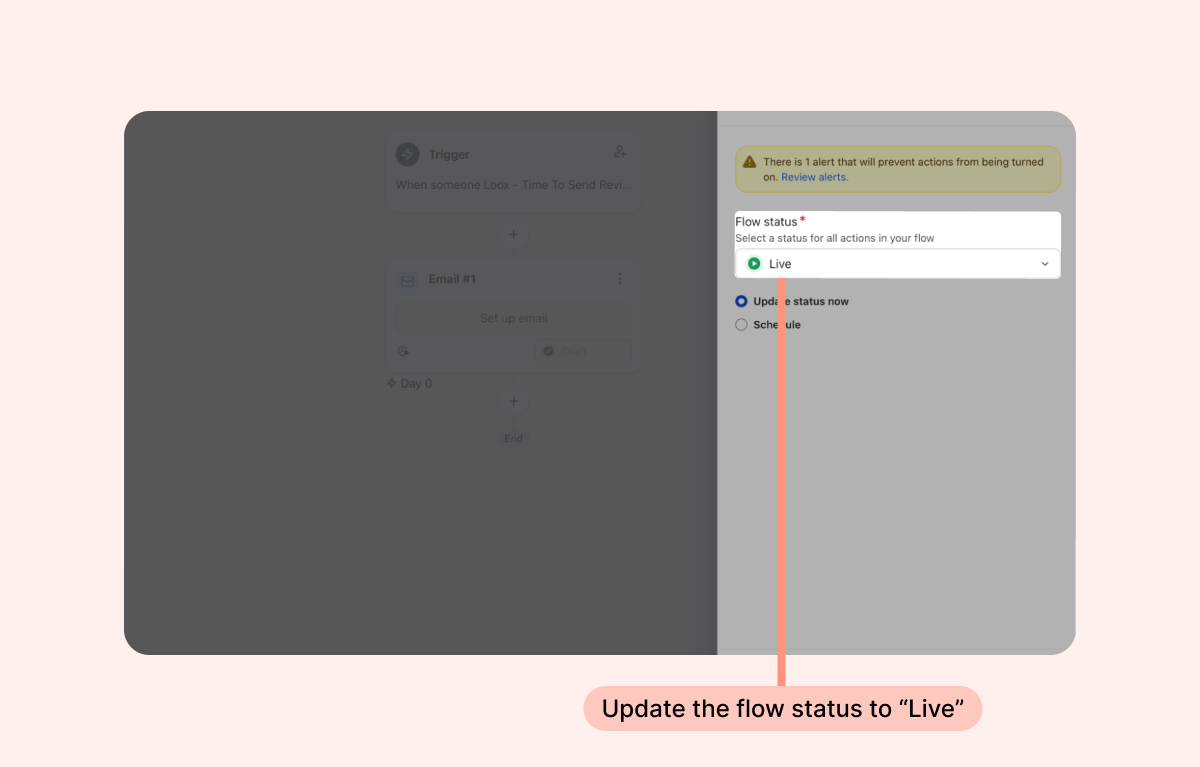
Now your review follow-up flow should be live!
Learn more about creating Flows on Klaviyo's help article: Getting Started with Flows.
If you have more questions, contact our Support team. We’re available 24/7 and happy to help!
You can also contact Klaviyo's support for further assistance on setting up campaigns and flows: Contact Klaviyo support.